Notifications in Mobile Application
15th Jul 2024
8 Minutes Read
By Rajvi Shah

In the mobile applications world, Notifications are the most crucial part of business that helps to engage your users actively. It is considered as alerts or messages sent to the users from the application. These notifications appear as sharing short content in form of pop-ups or banners on users' notification screen to inform them about events, updates, or any other important information from the app.
Notifications are essential tools for conveying timely information to users across various platforms quickly. It can be sent to various devices like mobile devices, desktops, laptops, and web applications and can be sent in the form of notifications, in-app messages, emails, and SMS notifications, each of these serving distinct purposes and contexts. We’ll be focusing here on Android Mobile Notifications using Firebase
Benefits of notifications usage in mobile applications:
- Timely Information Delivery: Keeps users informed about important events or updates as they occur.
- Increased Engagement: Enhances user interaction and engagement with applications and services.
- Convenience: Allows users to receive and act on relevant information promptly without needing to open specific apps or websites.
Let's begin with implementing FCM to your mobile app, make sure that your application is connected with Firebase Project. If not please read this instruction to integrate Firebase with an Android App.
Connecting Android Project with Firebase
- Follow the procedure of Firebase and android app integration
- Under the ‘Tools’ select Firebase.
- Navigate to ‘Cloud Messaging’ and check that the project is already connected to firebase or not.
- If not connected, follow the instructions by ‘Firebase assistant’ to connect your project
- Thereafter, follow the further steps of building FCM (FirebaseCloud Messaging) connection.


User Permissions
Ensuring notifications do not infringe on user privacy is paramount to maintaining the importance of their consent. This is configured within the AndroidManifest.xml file, which declares the required permissions for your app. You need to declare the ‘POST_NOTIFICATIONS’ permission.

Note that, if your notifications depend on network data (e.g., fetching notification content from a server), you need to declare the INTERNET permission.

Testing Notification
Navigate to the Firebase Console to test your notification service.
- On the left panel, under the ‘Run’ section, select the Messaging option.
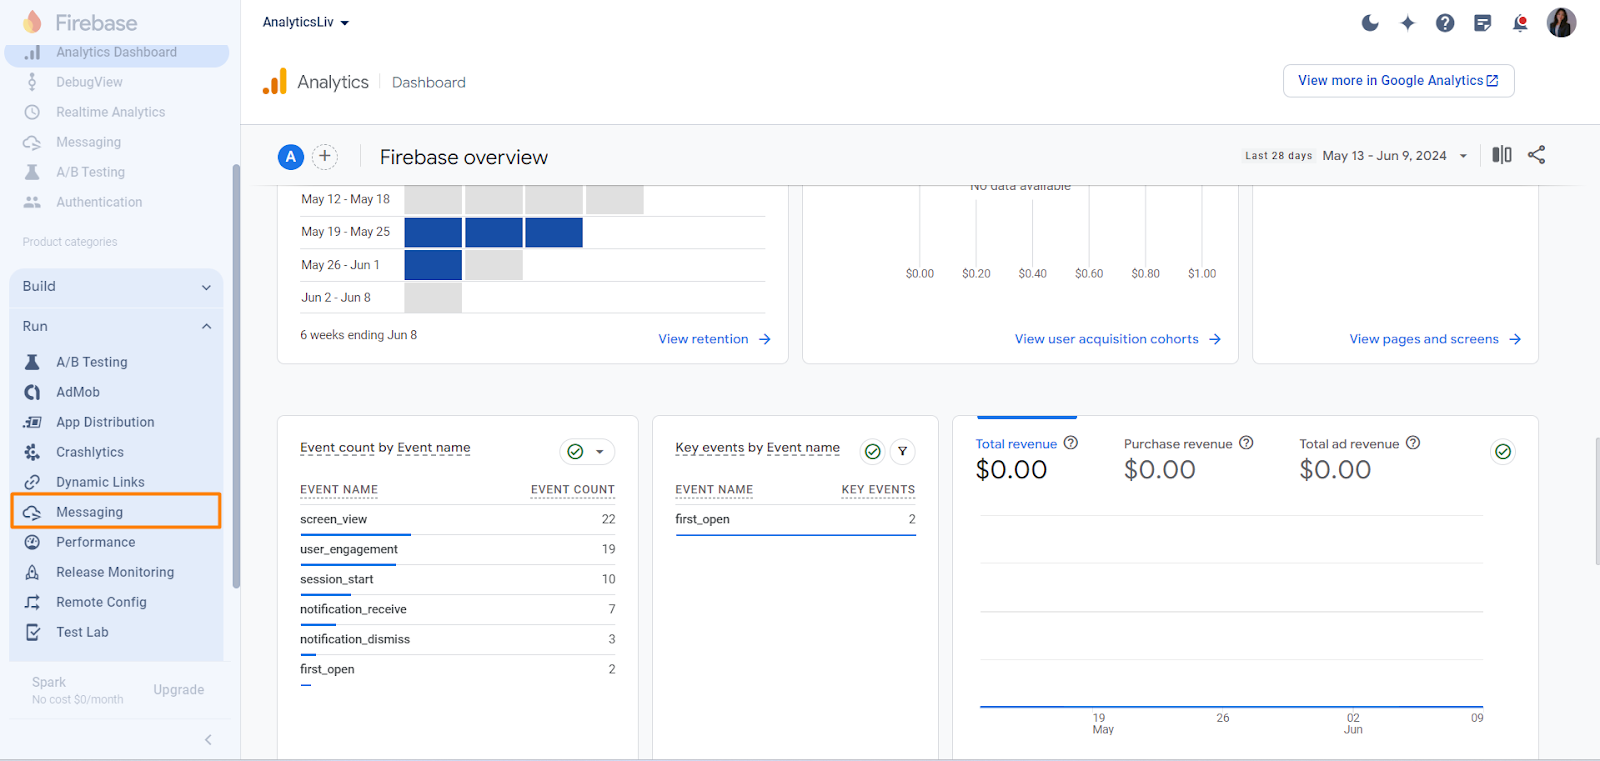
- You will observe the below screen on selection of Messaging, if you are creating it for the first time else it will show another screen showcasing a list of messaging configured.
- Hit ‘Create your first campaign’.
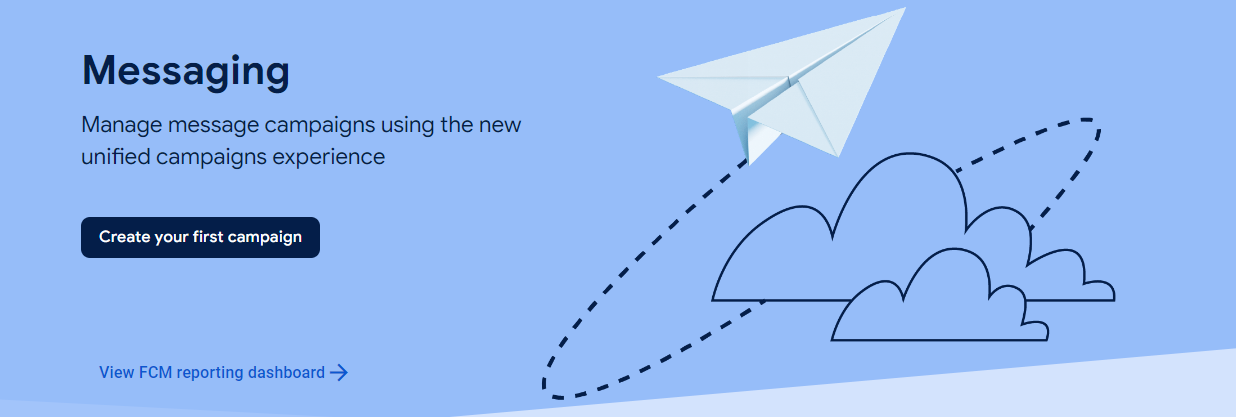
- A pop-up box appears to continue with your choice whether you want Notification service or In-app messages.
- For now, select the first option -> Firebase Notification messages.

- You will be navigated to a Dashboard for Messaging, where we will see two categories. One for ‘Campaigns’ and other for ‘Reports’.
- Hit ‘New Campaign’ to begin with our first notification.
- A new pop-up window will appear to guide you through the creation of the notification process.
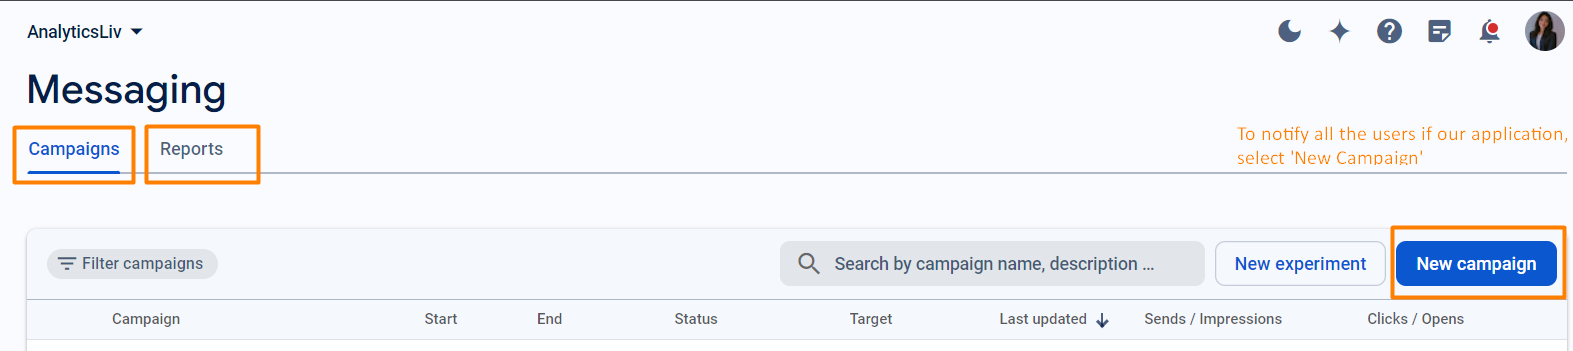
Campaigns, Helps to generate Notifications and run campaigns based on specific audiences to target to this group
Reports, Gives reporting insights on how notification campaigns are performing
Let’s dive in and create one Campaign using Notifications.
Create Notification in Firebase
Step 1
Add notification details. Where you have to mention the title of the notification and its description. On the right-hand side, you will observe the preview of how the notification will appear to users of Android/iOS.
You can send notifications to
- Click next to continue with further steps.

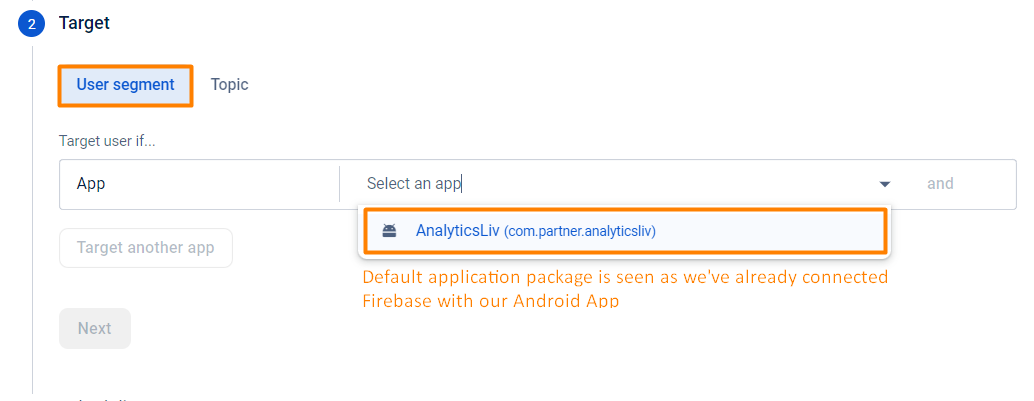
Step 2
This step includes the target application for your notification where you have to select the ‘your_application_package’ name.
- We can also target other apps as well having the same targeted audience for notification.
- The next part is to add Topic to your notification. This is mainly used for alerting specific targeting audiences on real time updates like weather forecasting.
- For example: Users of a local tide forecasting app could opt into a "tidal currents alerts" topic and receive notifications of optimal saltwater fishing conditions in specified areas. Users of a sports app could subscribe to automatic updates in live game scores for their favourite teams
- You can learn more about Message Topic here.

Step 3
This step includes scheduling of your notification.
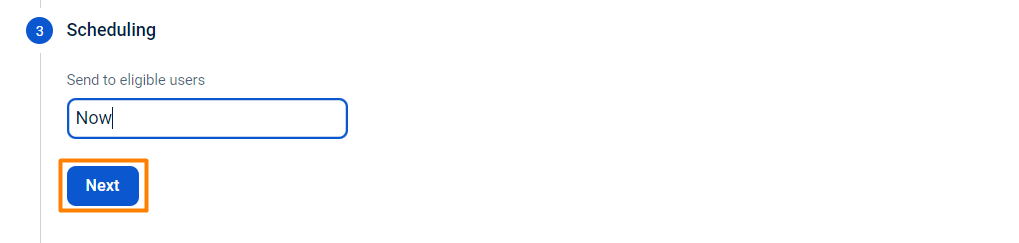
- You can either select ‘Now’ to review the published app or select date and time with the available options.
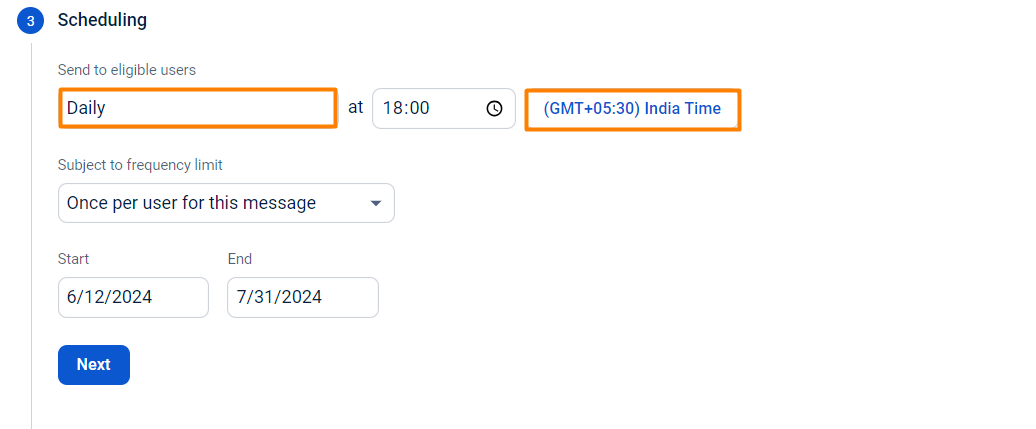
- There are multiple options available to set a specific period to circulate the notification based on our requirement. Such as ‘Now’, ‘Scheduled’, ‘Daily’ and ‘Custom’.

- On selecting ‘Scheduled’ you can set the exact date and time to trigger your notification.

- On selecting ‘Daily’, our application’s user receives notification on a daily basis based on the time predefined in the console.
- We can also set the duration of Daily notification. For instance, You want to notify your users for a particular period, you can predefine the starting and ending date for daily notification.
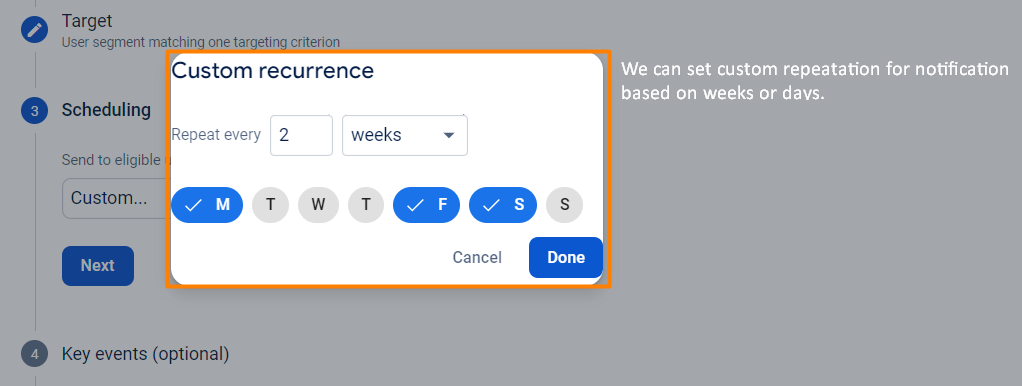
- On selecting ‘Custom’ we can add notification repetition based on weeks or days, by choosing custom days of the week to trigger notification just as depicted in the image below.
- Let’s select ‘Now’ for this example, as we want to get results instantly on how our test notification performs.
Step 4
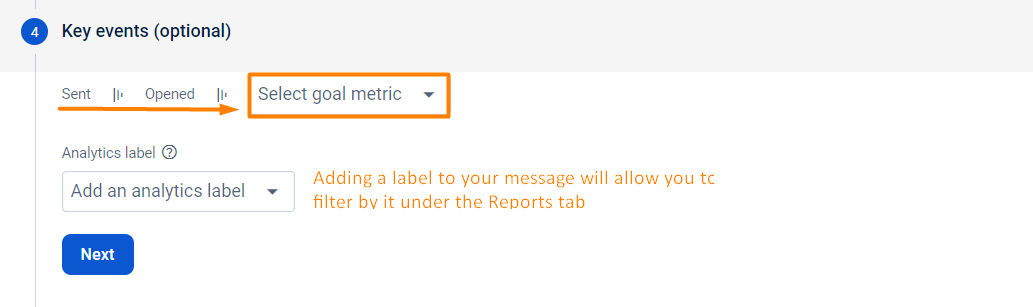
Key Events can be adjusted according to our goal for the notifications which user action you want to observe.
Here the key events are marked or recorded only if the notification is reached to the potential user and the user opens the notification. It will help to bottle neck the funnel of the events.
Step 5
Additional Notification settings include adding channel ID with its Custom key and value.
- Channel-ID is a unique String to identify each NotificationChannel.
- Here Custom Key/value pairs will be delivered with the message to your app.
- We can also Enable or Disable sound for the notification.
- Further, we can also set the Expiration date for our Notification Campaign.
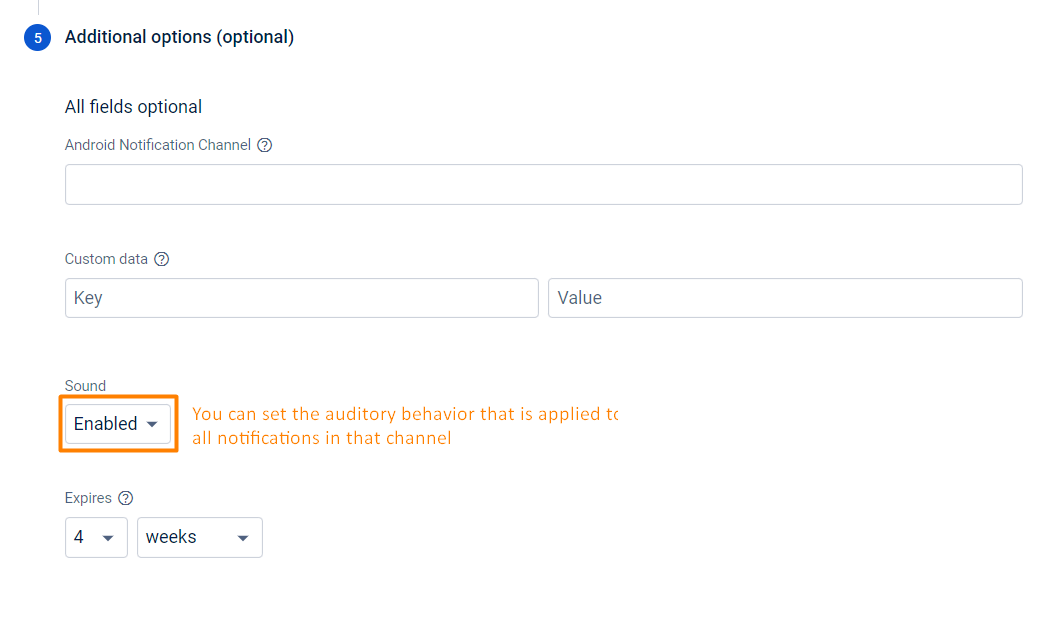
- After completing all the steps of setting up our First Notification Campaign, we can then move forward by clicking on the ‘Review’ button to review our campaign.
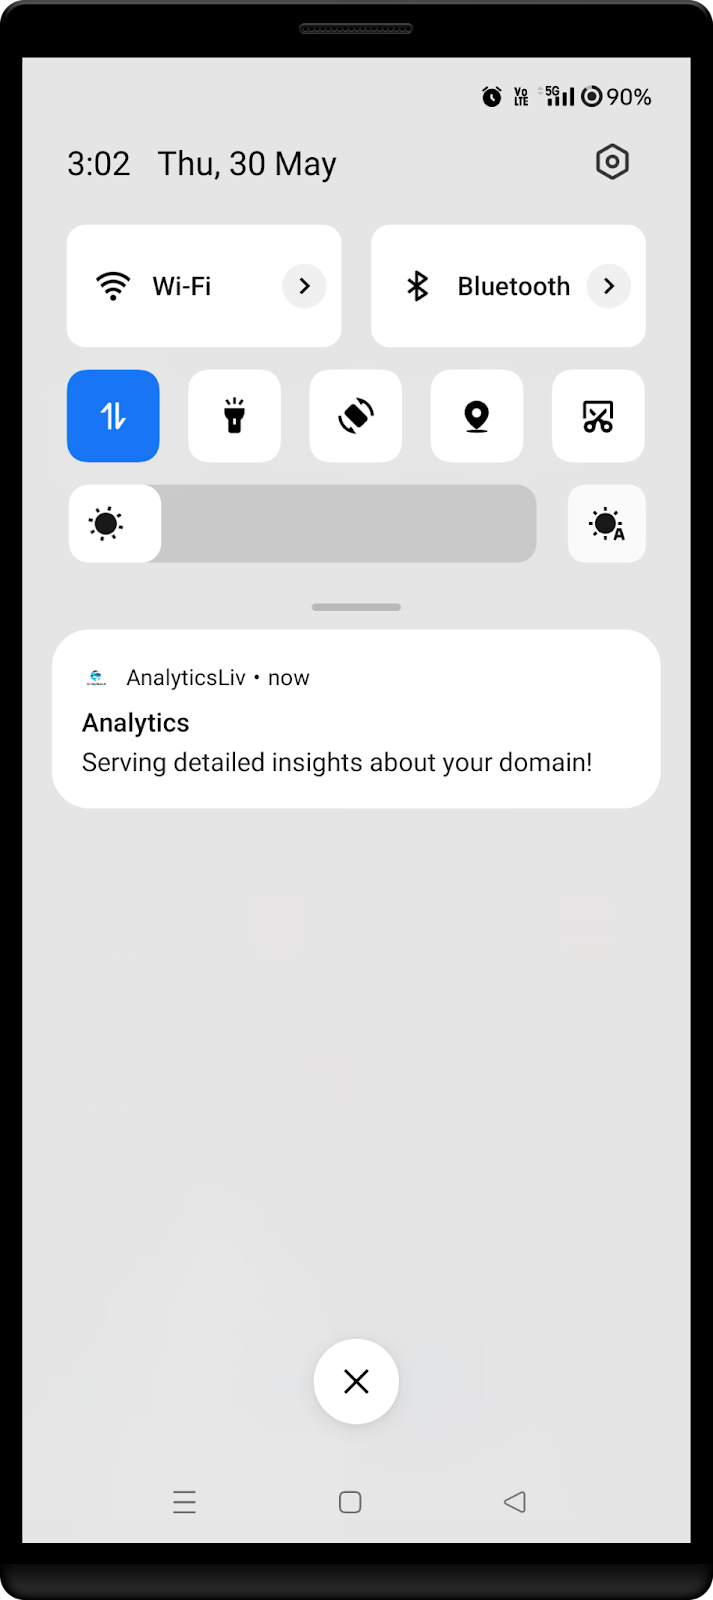
Step 6
Below image depicts how your Notification will be viewed on an Android device.
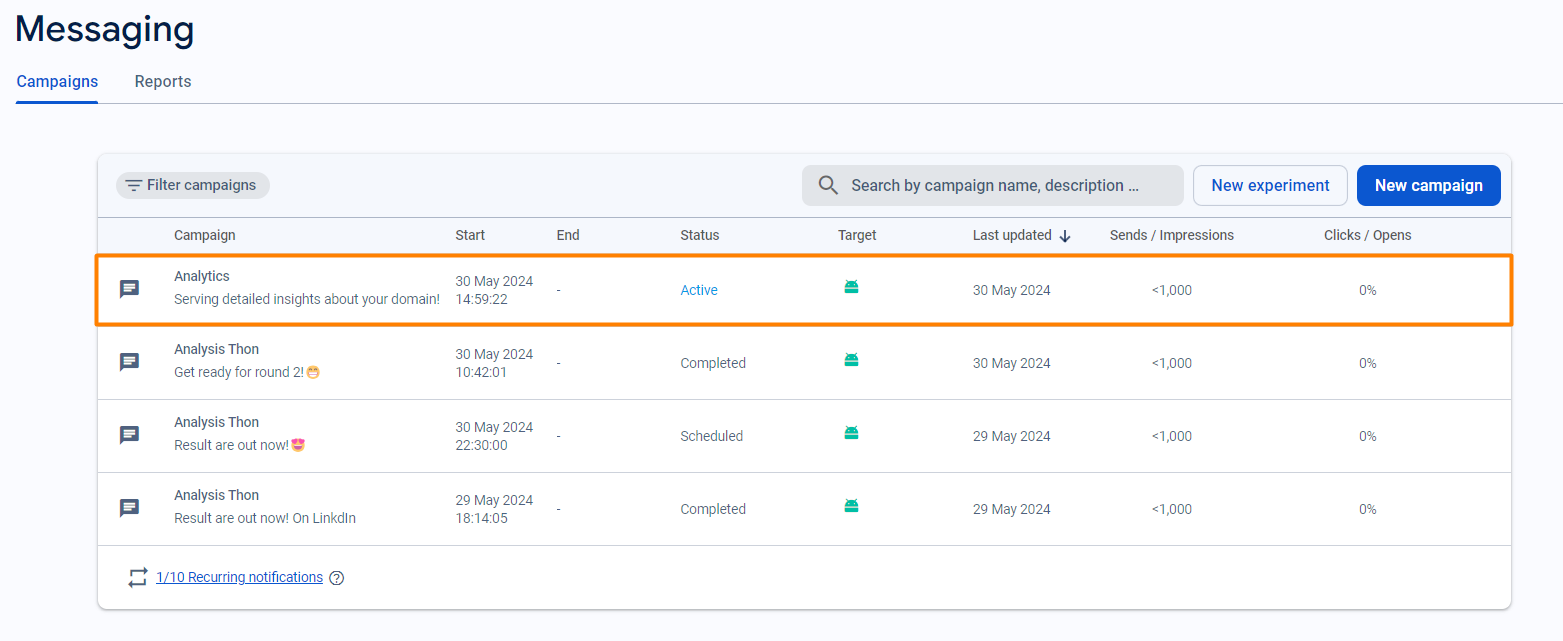
Step 7
View Campaign Dashboard and analyse metrics like sends, clicks, opens for individual notification campaigns.
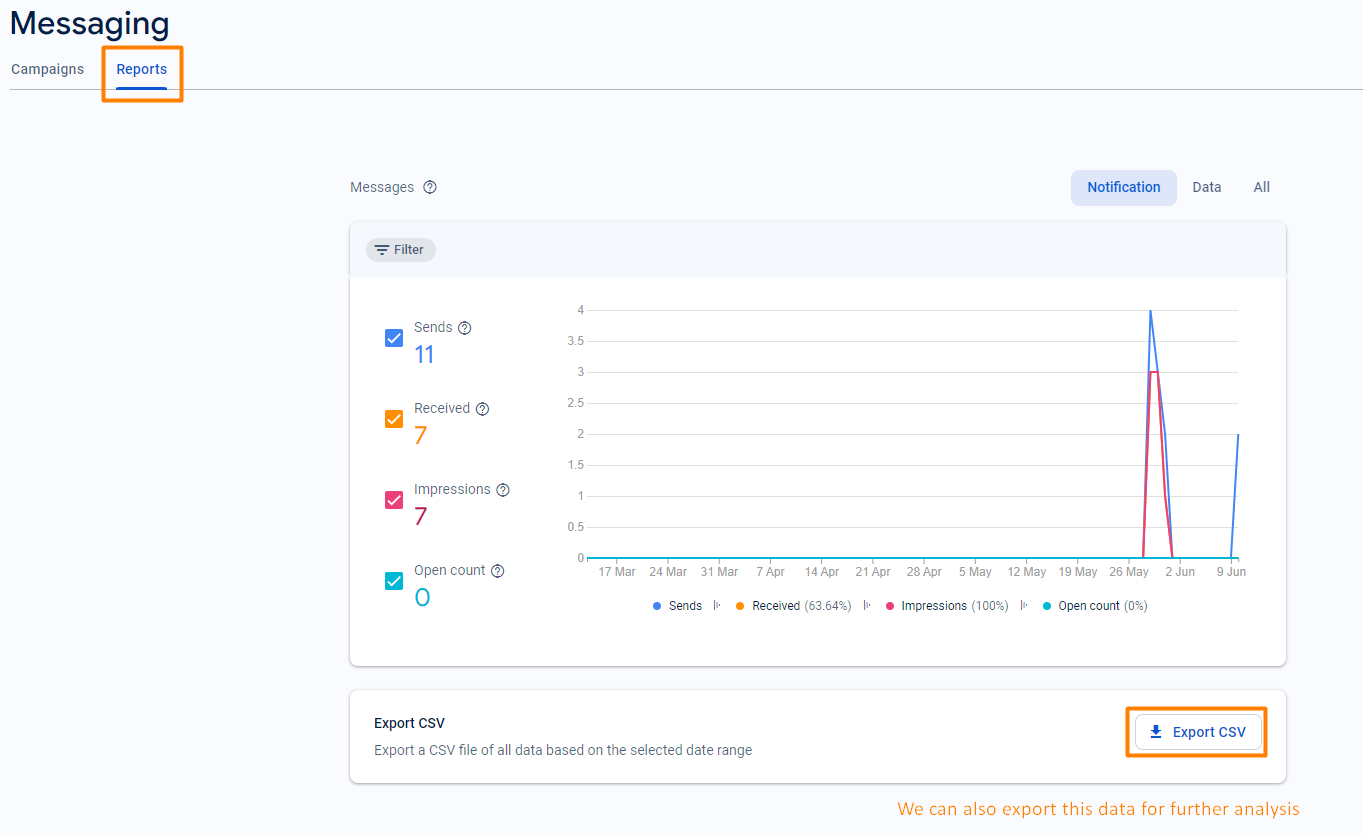
Step 7
Repoing insights, helps to understand the trends based on your notifications metrics like sends vs opened and understand how your notification is performing. It is visible under the ‘Reports’ tab.
The data can be exported in CSV as well for future purposes.
Conclusion
Notifications play a vital role in user engagement within platforms like mobile applications. You can send anytime even if the user is not active in your application. In this blog, we explored how to create, implement and schedule custom notifications using FCM - Firebase Cloud Messaging.
Implementing these strategies, can enhance the user experience, prevent information overload, and build lasting user trust.